Author’s Note: As of September 1st, 2021 all websites designed using Google’s Classic Sites will need to be converted to Google’s New Sites in order to remain visible to audiences. Websites that have not been converted by September 1st will be archived to the corresponding website administrator’s Google Drive.
This article picks up after the point of conversion to New Sites and is intended to provide customization and design tips. A step-by-step tutorial on how to convert from Classic Sites to New Sites is available via Google’s Help Center.
Before You Begin, Locate a Backup Copy
After converting the site, there is a decent chance the new site looks nothing like the original. This is due to the site being reformatted into one of Google’s new themes. Before beginning to reformat, try to locate a backup for the site to ensure content is preserved.
Where can I get a copy of my website?
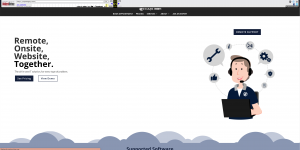
Ideally, there is a backup or duplicate of the old site to use for reference. If no copy of the old site is available, try searching the website URL using a free internet archive tool like the Wayback Machine. The Wayback Machine uses a bot to index and screenshot webpages. If your site is more than a year old, odds are the Wayback Machine has a copy of it. Here’s an example of a throwback of the ITGuys Team design, archived in the Wayback Machine on March 5th, 2021:
New Sites Design Limitations & Workarounds
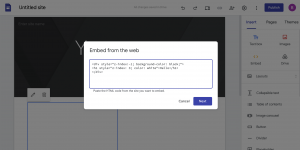
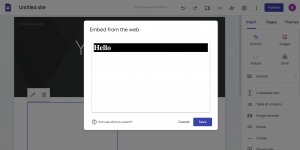
Google’s New Sites offers 6 theme options – Simple, Aristotle, Diplomat, Vision, Level, and Impression. The “Simple” theme option provides the least amount of extra elements making it the easiest to customize. These design tips can be applied to any of the listed themes, however, there are some significant limitations to Google’s 6 themes. Listed below are a few common limitations and some possible workarounds. Overall, if an element is unable to be properly made using Google’s New Site tools, using the Embed button to write inline CSS does work quite effectively in most cases.
Overlapping Elements
In other CMS site builders such as WordPress and SquareSpace, designers can utilize no-code CSS functionality such as z-index, margin adjustments, or the transform property to overlap elements. These options are currently unavailable in Google’s New Sites. It’s still possible (and recommended) to write custom HTML and CSS using the Embed function, but some coding knowledge is required to effectively use the Embed tool.
A possible no-code workaround here is to create the elements in a separate design program, export as an image, and upload the image as a background in the targeted section.
Another possible solution is to custom code the z-index CSS using the “Embed” button on the right design panel.
Customizing Colors
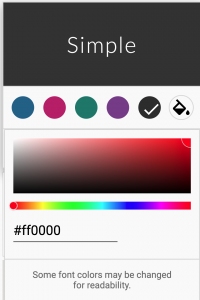
Google’s themes give users the option to choose one accent color using a 6 digit hex code. The accent color is listed as “Emphasis Color 2”.
If more colors are desired, there are two possible workarounds.
Using accent colors as Heading styles. To do this, highlight the chosen text, select the underlined ‘A’ icon, click the ‘+’ icon, and type in the hex code for accent color.
Alternatively, it would be possible to create design elements in a separate design program and upload them as images into the site.
Fonts
Unfortunately, all text changes will need to be made to each individual section; there are no site/theme level font customization settings. The good news here is all of the fonts previously available in Classic Sites are able to be used here. Similarly, font stylings including hyperlinks and bolded/italicized text should have all carried over from Classic Sites.
Navigational Elements
The Settings (gear) icon in the upper right corner will allow for some navigational customization. Users can choose between a left column or a top row menu. Users can also customize
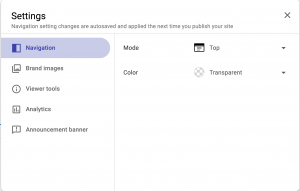
the color so long as it is black, white, or transparent.
In some cases, none of these options fit well with the desired look of the site. In such cases, first hide all pages from the navigational menu. Next, make sure the navigational menu is set to “top” and transparent and remove any included logos. Finally, use the “Header” section to create your custom navigation bar. Be sure to replicate this on every page so users can effectively navigate the site.
Buttons
While there is an option to create a button element on the right panel, there is not much room for color customization. A better option here is to create a button element and insert it using the “Embed” option on the right panel.
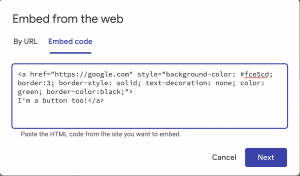
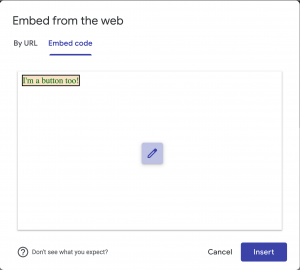
Hopefully, Google will release an update to allow for more customization in future versions of the site. Until then, these are the best solutions we found for clean, responsive sites.
Got a question? Feel free to send us an email at support@mynewitguys.com or call us at (303) 578-6256.
Happy designing!


Recent Comments